DIY Craft Plastic + Vellum Paper Greeting Cards
DIY Greeting Card | Learn how to Create Unique Cards Using Grafix Clear Craft Plastic Sheets + Grafix Vellum Parchment Paper | by maritzagarcia.website
This blog post is a collaboration with Grafix Arts who also provided me with all the Grafix Brand materials I used for this project. This blog post also contains hyperlinks to Grafix Arts products and/or links to some of the other products I used to create this project. Note: I don’t get compensated via Grafix nor any other company if you purchase any of the materials listed. I add links to help make finding the project products easier for you to find if you are interested. I only recommend products I trust and use for my projects. You will not be redirected to any other website(s) unless you choose to click on the links provided.
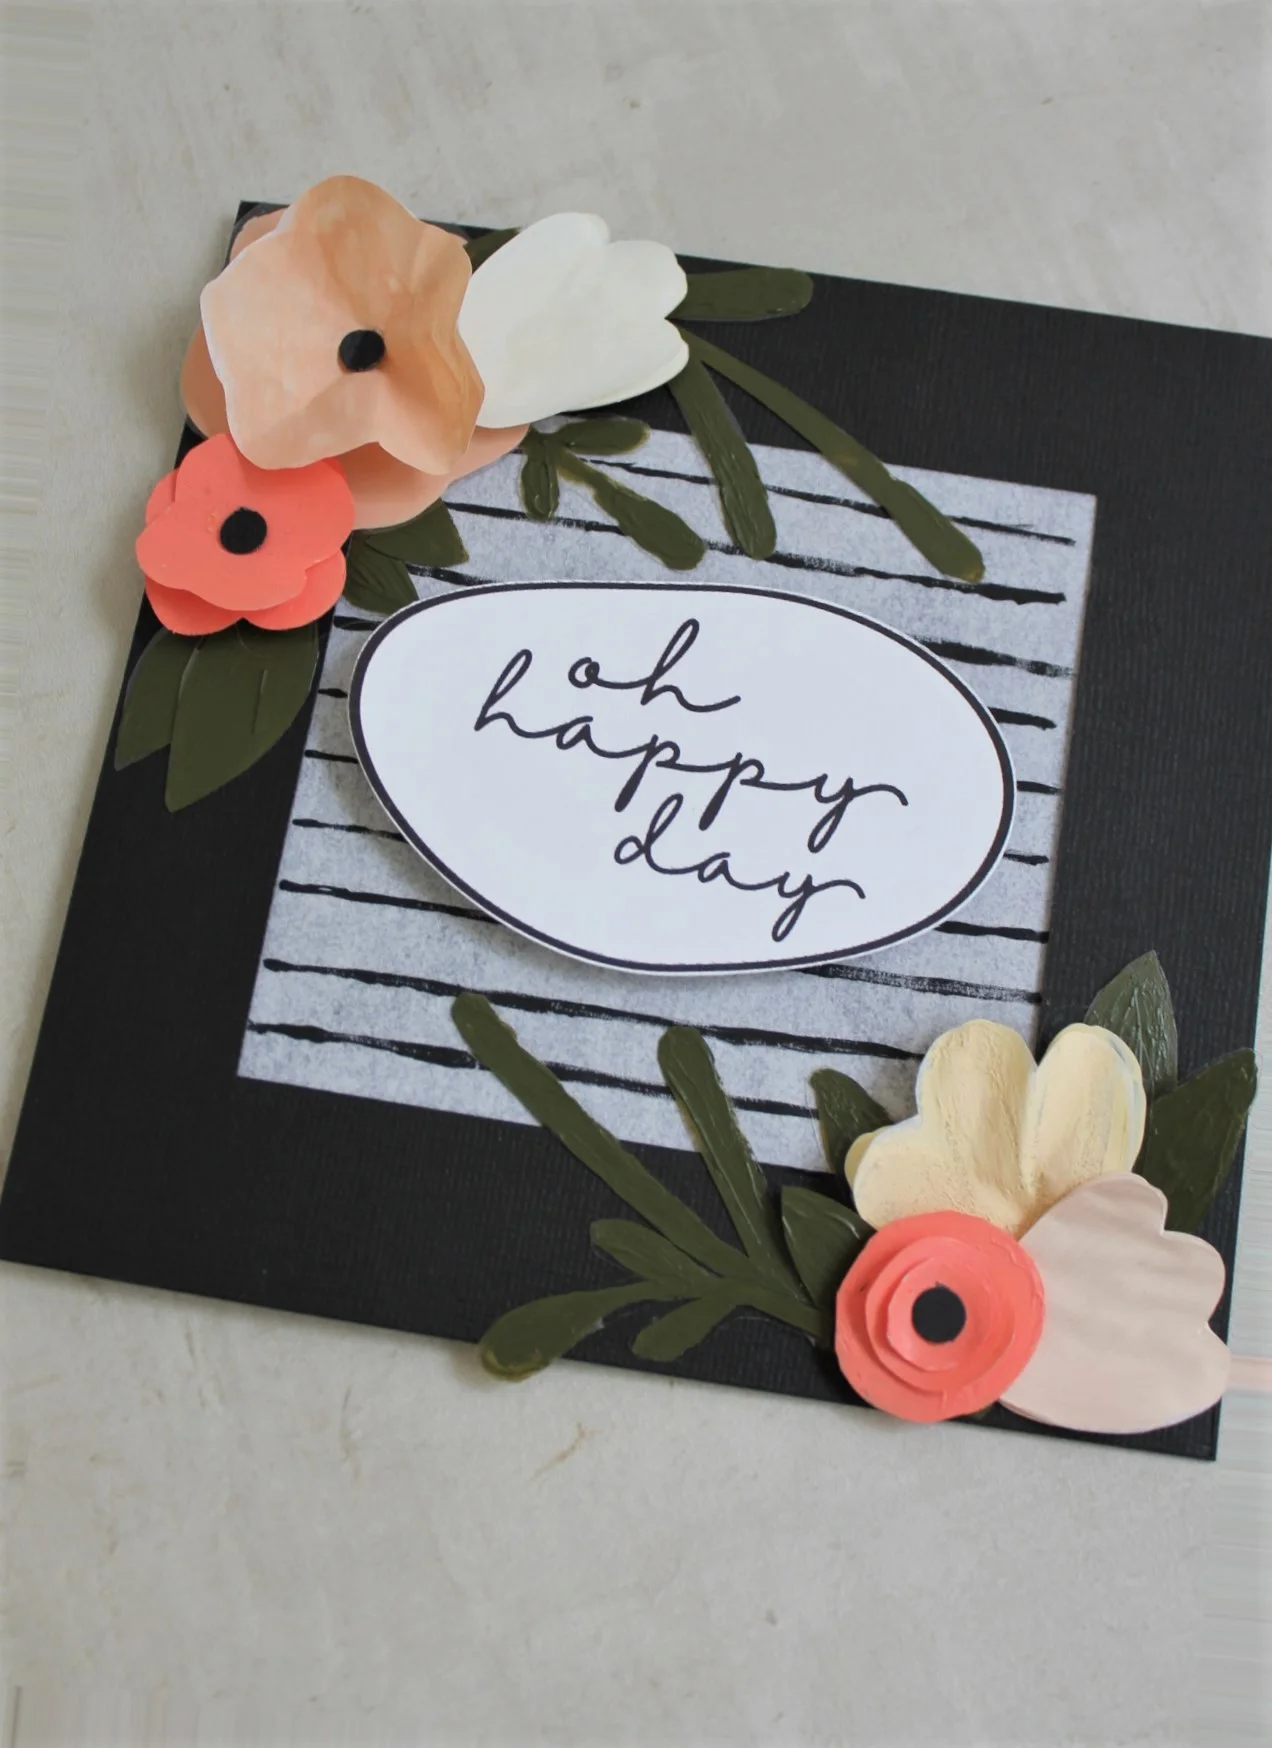
Today I’m sharing a fun way to create unique cards using Grafix vellum paper + Grafix clear craft plastic. If you like handmade projects as much as we do, you’re in the right place! This project requires cutting and painting, if this sounds fun to you, pull up a seat and continue scrolling down for more details. Let’s get started.
SUPPLIES NEEDED
Grafix Clear Craft Plastic Sheets
Grafix Vellum Parchment Paper
Acrylic Paint
Paint Brushes
Scissors
X-ACTO Knife
Black Card Stock
White Card Stock
Double-Sided Adhesive Roller
Form Adhesive Circles
OPTIONAL SUPPLIES needed
printer
cutting machine
INSTRUCTIONS
1. To begin take a sheet of Grafix Clear Craft Plastic and paint an assortment of leafs and flowers directly onto your craft plastic sheet. Remember -there’s no need for perfection. Take your time and have fun with your design. Set aside a let dry for about 15-20 minutes.
2. Once your leafs and flowers are dry, cut them out.
3. Next, take a sheet of parchment vellum paper and trace around your painted clear craft plastic leafs and flowers, since they now double as templates. You’ll only need to do this part if you want to add a second layer for more dimension to your handmade card(s).
4. Once you have traced your leafs and flowers onto your parchment vellum paper, paint those too, let dry, cut and set aside for later.
5. Next, take a NEW sheet of parchment vellum paper cut into a 6” x "6” square to create a striped background sheet, simply draw on some strips or dots.
6. Next, take a sheet of black card stock paper (or any other color choice) cut into a 6” x 6” square sheet. This will become the cover mat you will use later for your greeting card cover. This part can be cut out by hand or by using a cutting machine.
7. Now take a piece of any heavy weight white card stock to create a bubble sentiment. This part can be handmade or using a printer.
8. Once done, you should have leafs, flowers, a mat, a striped sheet of vellum paper and a bubble sentiment.
9. Now start assembling your greeting card face cover. Play around with your shapes by moving them around until they feel right to you. Once you are satisfied, you will need double-sided adhesive tape and some form adhesive circles to secure everything on your greeting card face cover.
10. Once your cover is done, take a 12” x 12” card stock sheet, cut to measure 12” L x 6” W and fold in half to get a 6” x 6” square. Lastly, take your greeting card face cover and glue to front of your folded 6” x 6” square card and that’s it -done!
Project Time: 45 Minutes
As always, I really do hope you give this DIY a try. And don’t forget to share your Knot Just Paper projects on Instagram using #knotjustpaperDIY. Until next time friend. Happy crafting!
-Maritza.


